You have a picture you want to use on the web, put in an album or simply print, but you think that when it was entered into the computer (scanned, from a digital camera or video camera) it lost some of its quality? In the next couple of steps we will explain how to use Adobe PhotoShop. PhotoShop is one of the best programs for manipulation, creation and optimization of raster images. In order to get better acquainted with its possibilities, you have to understand some basic notions. Raster program means that it presents images as dots or pixels. This is measure which is not directly related to print. For us it is important to know the difference between pixels and DPIs. Images we are processing have to have at least 72 DPIs if they are used on the web or more if they are to be printed. But we will talk about that later. 
DIMENSIONING After the picture is on the computer, we must decide whether we want to keep the whole picture or use just one part of it. We can do that by using the Crop tool. It enables us to cut out a part of the picture that we want to use. Follow the steps: select Marquee tool or use the M key for the same purpose. 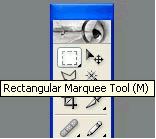
After that click on the angle of the picture you wish to keep, and drag to the other desired angle while constantly holding the mouse key. Let go of the key. You have now selected the desired area and can cut it out by using the Crop tool. 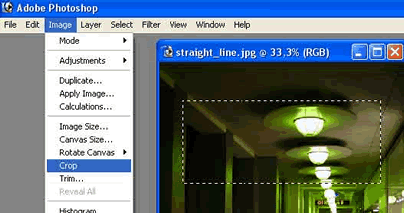
Size of the picture is set by selecting the menu Image>Image Size. 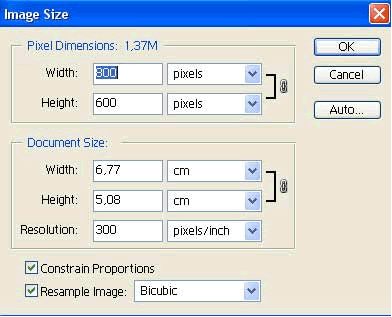
Offered options enable us to enlarge or decrease the size of the picture. If Constrain Proportions option is on it will keep the ratio of picture height and width at a constant. Pixel dimensions are the size of the image in pixels on the screen, while Document Size is related to image size, e.g. what size the image is going to be if printed. By clicking OK you confirm the parameter you entered.
COLOURS
Colours menu is started by selecting Image>Adjustments. If the image is in colour, the colours can be changed in the same menu under Colour Balance. 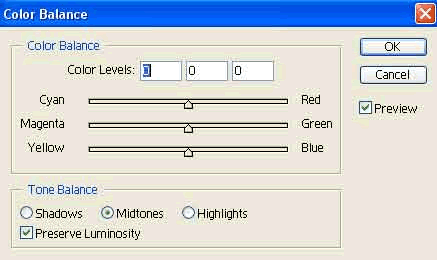
We can play with the quantity of basic colours. By shifting the arrow on the line, the intensity of a certain basic colour is set, and by that also the desired effect.
In the same menu we can find the option Desaturate which changes coloured into black and white images. Brightness/Contrast option in the same menu is also frequently used. 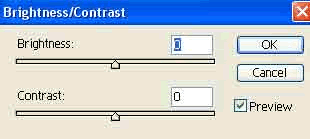
Brightness determines how bright/dark an image is. Contrast sets the difference between bright and dark.
SAVING DATA
After processing the image it has to be saved. That is done by choosing File>Save. When saving, choose picture format ( JPEG , GIF , TIFF ... ). If the material will be used for the web or onscreen display choose JPEG . If you need to print the material, save it as TIFF . | 
