CLEARING THE VIDEO MATERIALS
When capturing materials, black edges on the side can appear. They have to be removed by using the Crop and Aspect ratio options. It is important to pay attention not to distract the aspect ratio of 4:3 while we are cropping the image, since it can result in picture distortion, which does not look nice. Crop tool can be found in the Video window (if you can’t see it on the work surface, start it by clicking Windows/Show video effects). This window is the most important for all the effects and transitions which you will use in the processing – video, audio and transition effects. Since you will be working with big files, Premiere guarantees stability, but due to certain prerequisites (e.g. RAM memory etc.) instability is possible and software can simply collapse. You do not have to worry that you will have constant problems with that, but it is good to know. That is why it would be best to save the document (Save As – don’t save the video material, but a small file which will serve as information about where the video materials are and which effects you used) before you start working on it. Also, as you work click on the Save option in the drop-down menu File or use a shortcut Ctrl+S on the keyboard every minute or two. 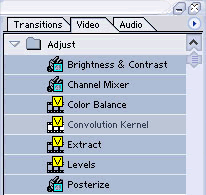
Not all the colours turn out the way we would like them to. Bad light etc. can influence the picture quality, so it is up to you to try to improve them. In the Video window choose an effect with which you will improve the quality. Brightness & Contrast, Colour Balance and all the other tools which you might need to finalize the image are in this menu. You can easily activate it by clicking on it and transferring it to the video. The same applies to almost all the effects which you can use in this menu.
CUTTING AND PASTING
Determine which part you want to separate and click in the Timeline menu on Razor Tool C key (left down). A replacement for the arrow of the mouse will appear. Mark where you wish to make the cut in the video and audio recording and click on it. You will notice that one recording turned into two completely independent documents. You can join and separate them by clicking on one of the materials and simply dragging them left or right, depending on which material you want to move. Video and audio materials are linked, and if you wish to cut just the video or audio, right click on any of the materials and select Unlink video and audio option (right below). They will then be independent of each other, but be careful not to move the audio recording if you want it to be synchronized. Re-linking of video and audio materials is very simple, just three clicks away. First click on Link/Unlink, then on the materials you wish to join (first one and then the other). If this operation is not selected, since there are three operations under that button, make a long click on that button (over 3 seconds). All three options will appear and you can them select Link/Unlink. You can then link video and audio materials again.   PROCESSING OF AUDIO MATERIALS
Adobe Premiere also enables you to process your audio materials if they is, for example, too quiet or contain redundant elements, including noise etc. There are several methods of processing. The choice of method depends on what you want to do. If you only want to enhance the audio material, you can do that by right clicking on audio (bottom line), selecting the Audio Options (left down) and by clicking on Gain, set a greater or smaller percentage, depending on what you want, increase or decrease the volume. 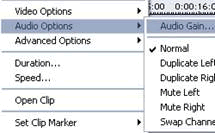
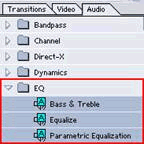
If you want to try to reduce the noise or add a lower or higher frequency (treble or bass) you can do that by selecting EQ (equalizer). However, if the audio recording you entered is very bad, you can’t expect complete improvement; you can use this tool to try to clear the sound as much as possible, but the change will not be significant.
FORMAT SELECTION
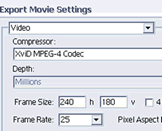
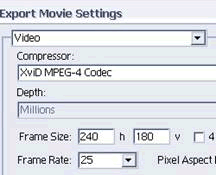
The size will be important if you know the purpose of the video you are working on. If you want to keep the video in its full size, format 720 x 576, you may have to increase the compression, since the file will be big, depending on the medium you use for storage (CD, DVD). For transition over the internet and streaming, 240 x 180 or an even smaller format is used (all the formats are 4:3 ratio, a standard on the PAL system).
SAVING THE MATERIALS
If you think you will be using the material again, it is best to export it into the same format in which it was imported into the computer - the DV format, which has no compression so non of the quality is lost. The downside is the big size of the file which will take up a large portion of the hard disk. It is, however, possible to cut the material into smaller 4-5GB parts and save it on DVD-ROM. You can process the compressed video and non-compressed DV, but compression causes loss of quality, depending on the level of compression.
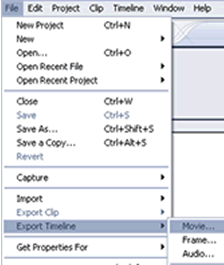
There are several companies which work on the compression technology development, so there are several formats with which to compress a video. Some of them are good, others not so good. The size of the files you want should be taken into consideration. If you want to save the materials on a CD later, we recommend you to use Divx/Xvid codec formats intended for that purpose and which are very good, although new, better codecs keep appearing on the market and slowly pushing the old ones out. Most codecs are free, but better quality ones may have a price. It is imperative that you are well acquainted with copyright, which means that you may not process video or audio materials if they have a copyright policy. |
|
|
|

